Setting up Flutter in Android Studio: Step-by-step guide
To create an Flutter Application with in Android Studio, we should take care of certain prerequisites. Means, setting up Flutter in Android Studio involves several steps like installing Flutter SDK, configuring the Flutter plugin and creating a Flutter project.
Step 1: Flutter SDK InstallationFlutter SDK can be downloaded from the official Flutter website, which is https://docs.flutter.dev/get-started/install. Make sure to download the latest Flutter SDK.
Step 2: Setting Up Environment VariablesYou can add the Flutter SDK's 'bin' directory to your system's PATH environment variable. This allows to run Flutter commands from the terminal. The steps for setting up environment variables can vary based on your operating system (Windows, macOS, or Linux). Refer to the Flutter website for getting documentation for specific instructions.
Step 3: VerificationTo verify proper installation of flutter, you can run the below command from the terminal.
"flutter doctor"To check the version of flutter installed open the terminal and run the command:
"flutter --version"Verify that Flutter is properly installed and displays the correct version information.
Step 3: Install Android StudioAndroid Studio can be downloaded from the official website, which is https://developer.android.com/studio
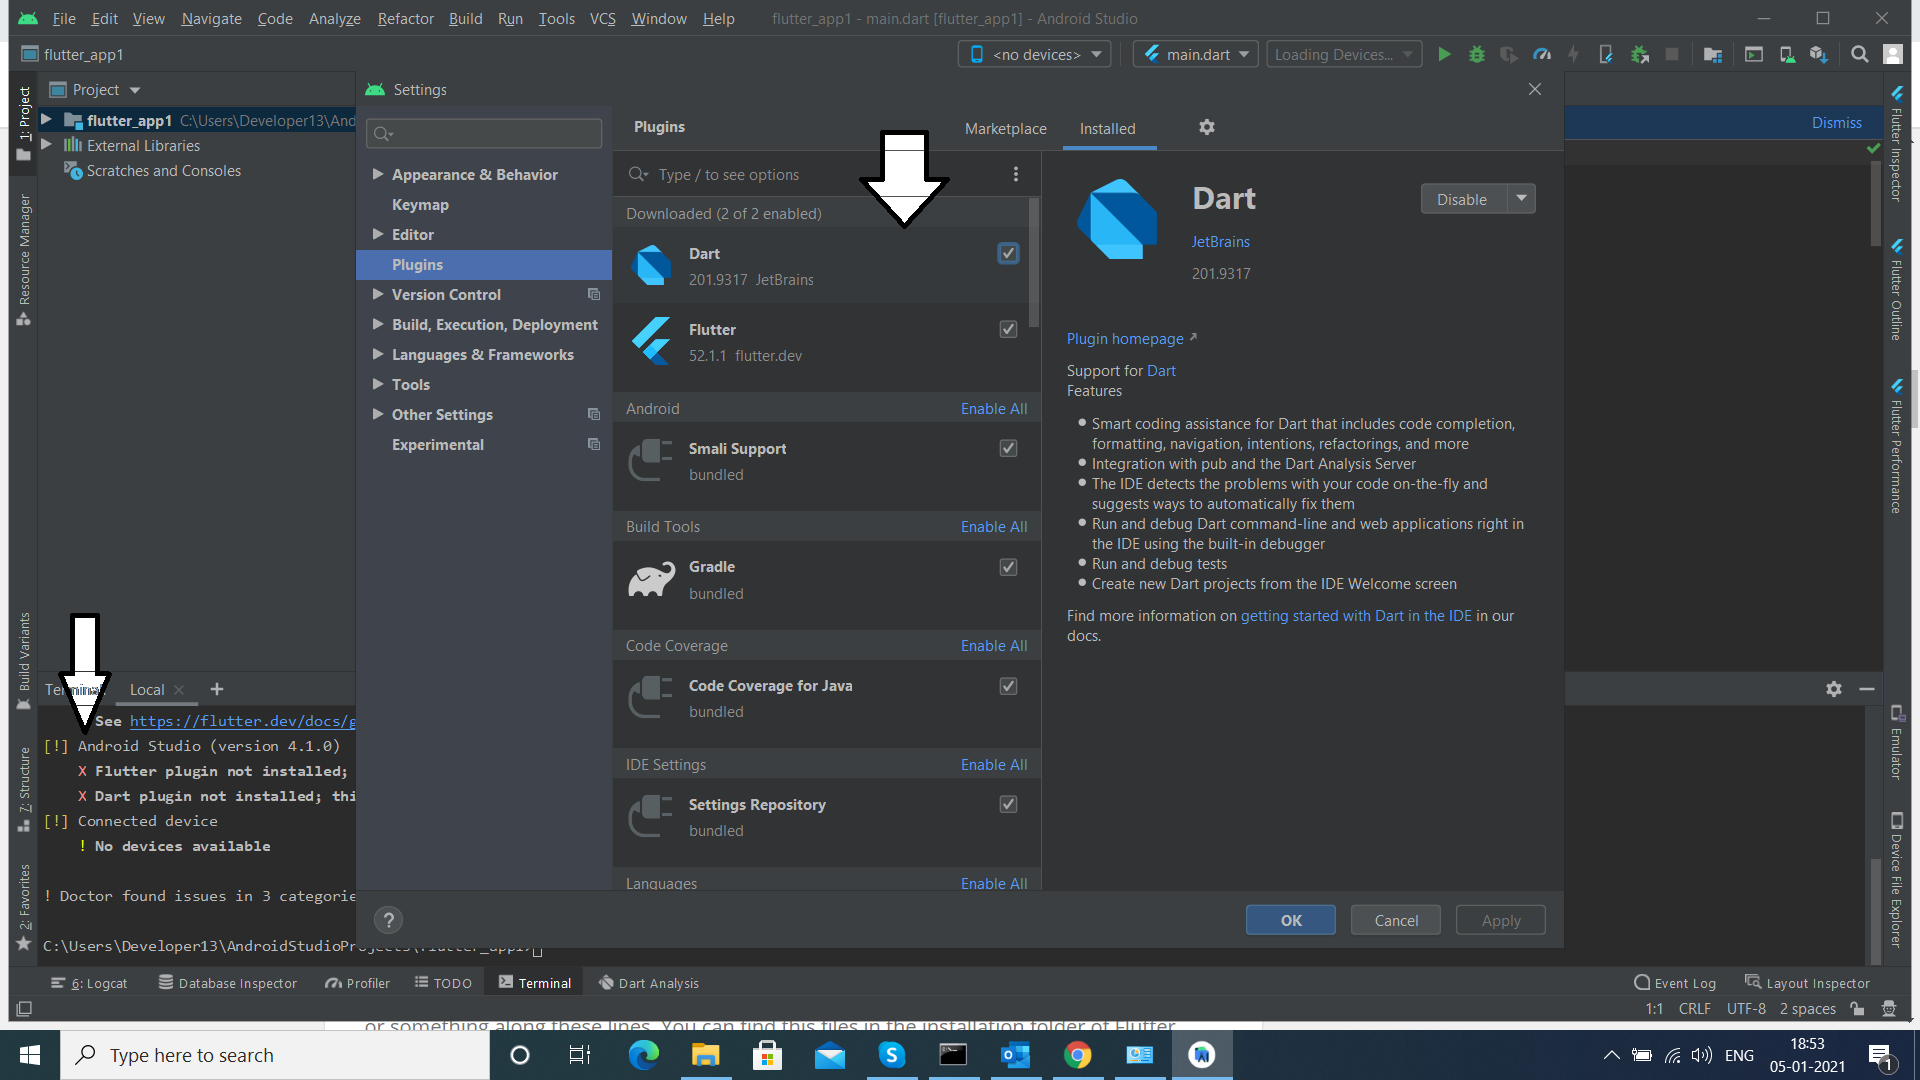
Step 4: Install both Flutter and Dart Plugins in Android StudioOpen your Android Studio and go to the Settings -> Plugins. Use search bar for getting the required plugins (Flutter, Dart). Install both plugins and once installation is done, restart the studio. Also make sure to set the Flutter SDK path to the location where you extracted the Flutter SDK earlier.
 Step 5: Create your first Flutter Application
To create a flutter application do as following:
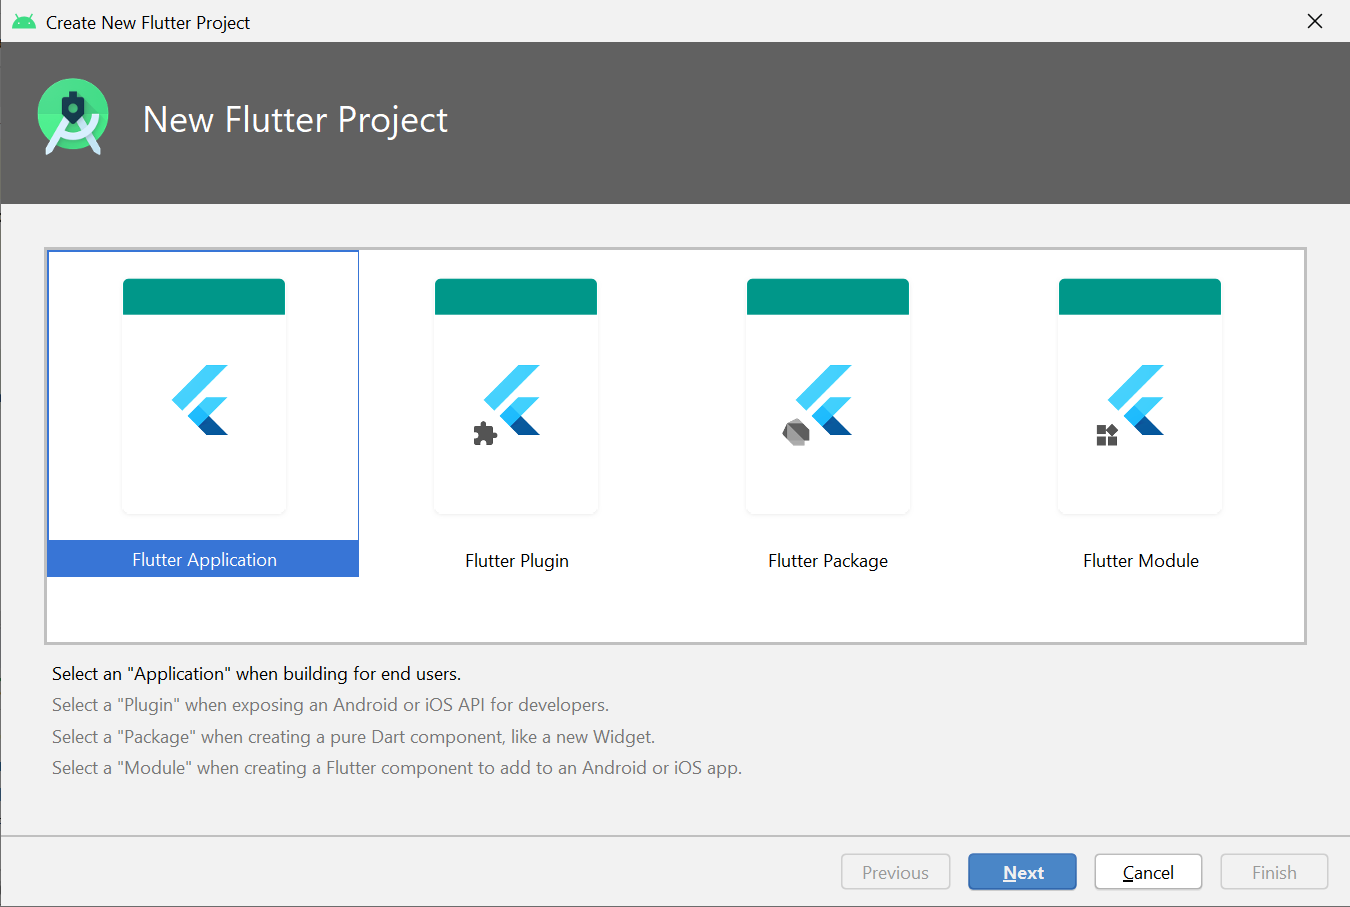
- From Android Studio select File > New > New Flutter Project.
- Make sure you have your required plugins and SDK setup. You can go to Settings -> Plugins to check if plugin are already installed or not.
- From the list of templates choose the 'Flutter Application' template and click Next.

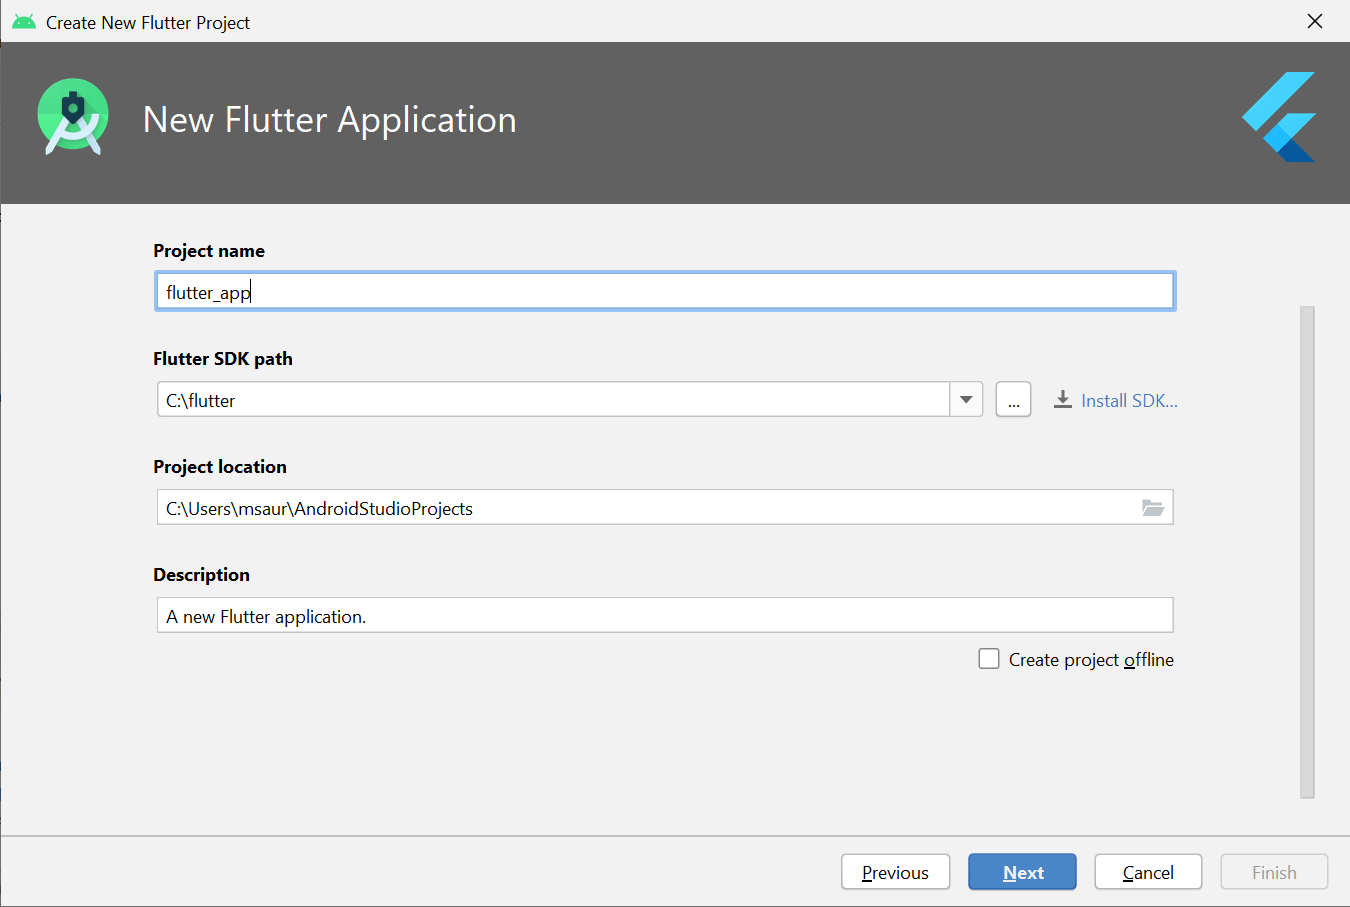
- Enter your project name, Flutter SDK path (if not already set), project location, and additional project details as needed. Make sure you project name is in lower case (ex : my_first_flutterapp) and click 'Finish'.

To run your flutter application first of all connect an Android device or start an Android emulator. Then you can click the 'Run' button to build and run the flutter application on your selected emulator.
Flutter Project Structure
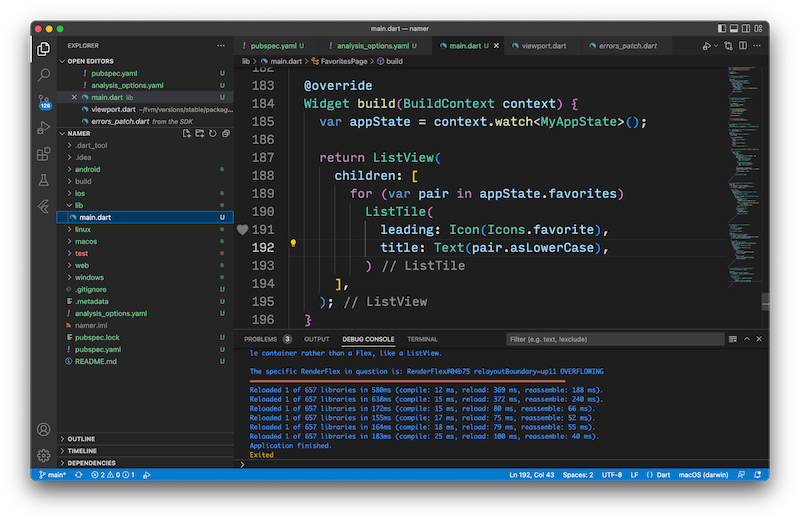
When you create a flutter application, the structure is slightly different than normal android applications developed with in an android studio. Various components of the structure of the application are as given below :

android: This is an auto generated source code to create android application
ios: This is an auto generated source code to create ios application
lib: This is the main folder containing Dart code written using flutter framework lib/main.dart : Entry point of the Flutter application
test: This folder contains Dart code to test the flutter application test/widget_test.dart - Contains sample test code
.gitignore: Git version control file
.metadata :This is auto generated by the flutter tools
.packages: This is auto generated to track the flutter packages
.iml: project file used by Android studio
pubspec.yaml: This is used by Pub, Flutter package manager
pubspec.lock: Auto generated by the Flutter package manager
README.md: This is the project description file written in Markdown format
Flutter Commands
Some of the useful Flutter commands that you'll commonly use during Flutter development are below:
flutter run: Build and Run the flutter app on connected device or emulator.
flutter build: Builds the flutter app.
flutter clean: This deletes build directory, ensuring a clean build on the next run.
flutter packages get: Fetches the dependencies specified in your pubspec.yaml file.
flutter test: Runs the tests.
flutter help: Displays help information.
These commands are crucial for creating, running, testing, and managing a Flutter project most efficiently. Make sure to you refer to the Flutter documentation for detailed information for each command.

Nothing here yet

Linta Mathew
26 October 2023• 12 min readExplore a treasure of technical blog posts on Android, Big Data, Cloud, Python, and More!
© 2026 Nervo Tech. All Rights reserved.