Apache Solr : Getting Started
Today, let’s discuss about getting started with Apache Solr – the text-based search engine. In this post, we will discuss on how to get a local instance of Solr running on your machine. Hope you are familiar with the basics about Solr. If not, you can go through some of my previous posts Apache Solr - The search platform and Mastering Solr - Essential Technical Terms to understand more about Apache Solr.
Installation
I will guide you through the steps to setup a local instance of Apache Solr using Docker. This helps you to get started with the Solr much easier. For reference on how to install and setup Docker in your windows system, refer my post Understanding Docker: A Beginner's Guide. Once you have the Docker installed and configure, let’s start the Docker Desktop application. This provides an UI to perform most of the Docker operations. Now follow the below steps to get your Solr instance up and running.
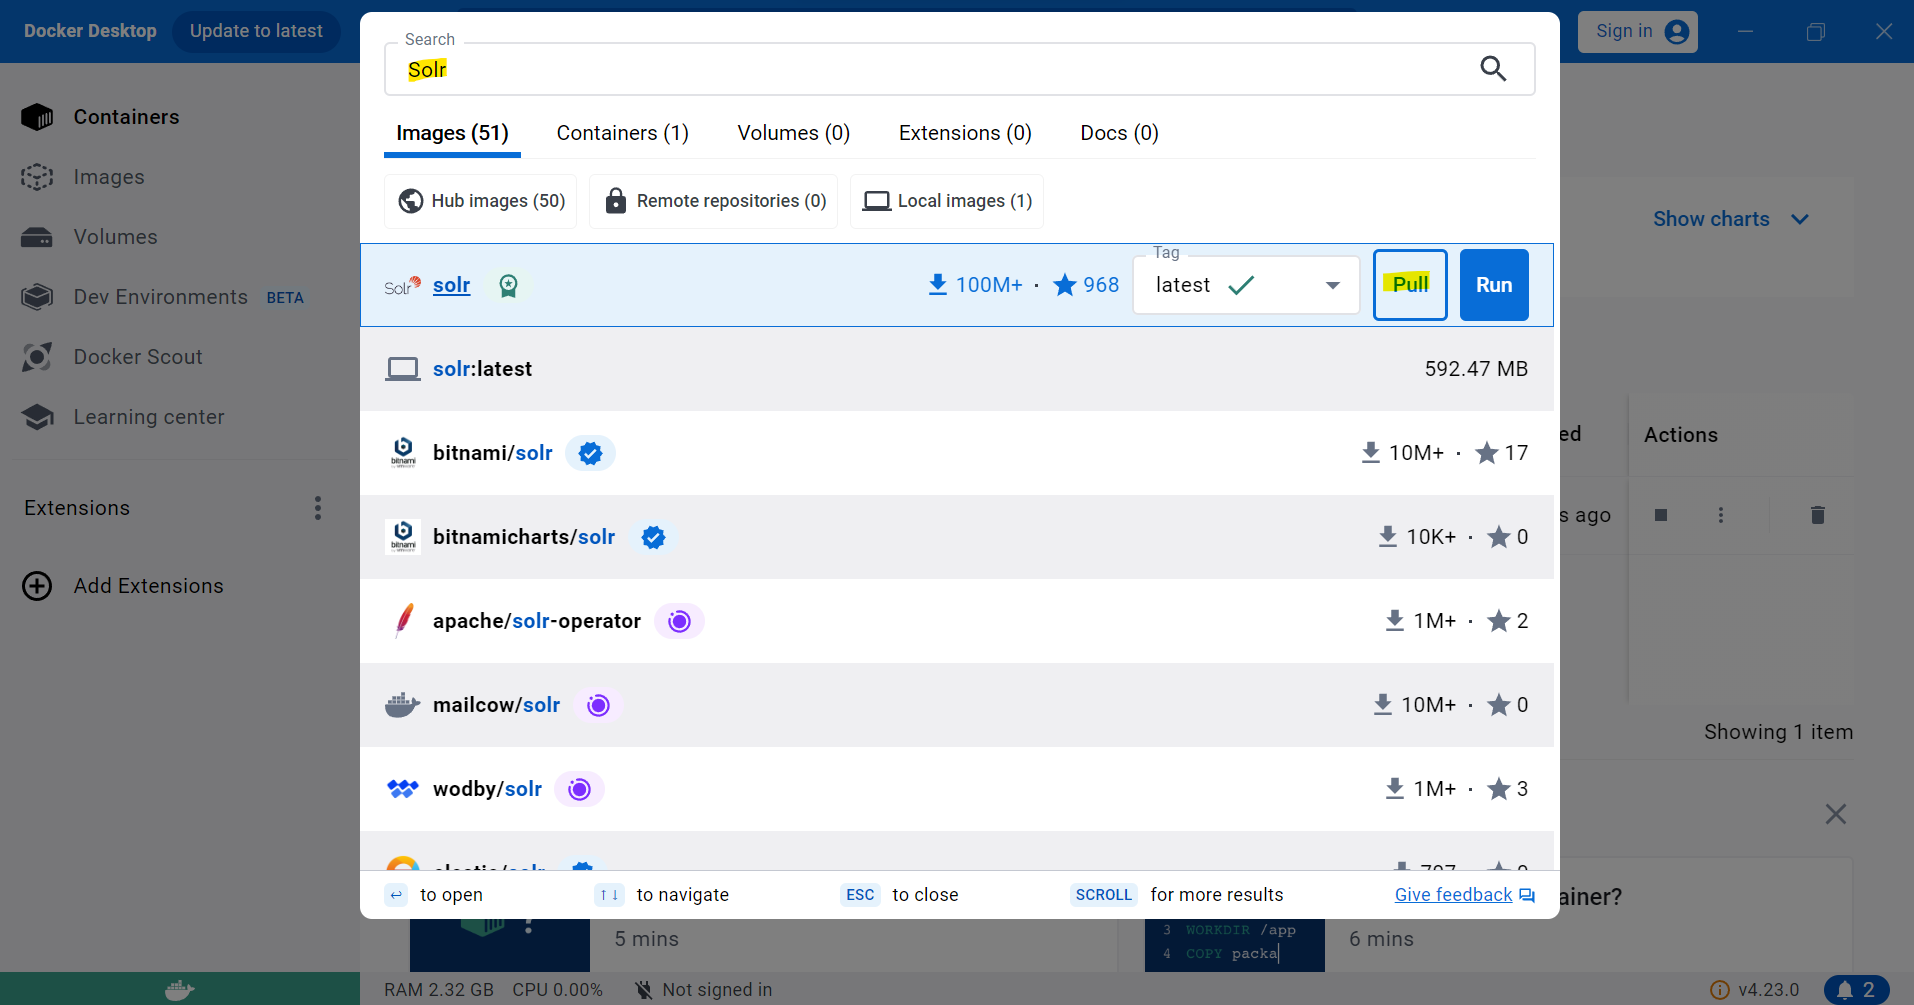
Step 1: Open Docker Desktop application. At the top of the window, you will find a search box. You can use it to get the docker images directly from the Docker Hub. Search for Solr and the first one that comes up will be the official image for Solr by Apache.

Step 2: Click on the Pull button and the Solr docker image will be pulled from Docker Hub to your local system. This allows you to use the pulled image to create Docker containers that runs Solr inside. The Pull usually takes a couple of minutes to complete. Once it is completed, navigate to the Images tab our your left and you could see that Solr image is pulled successfully on your system. We will be using this image to create a containerized running instance of Solr.
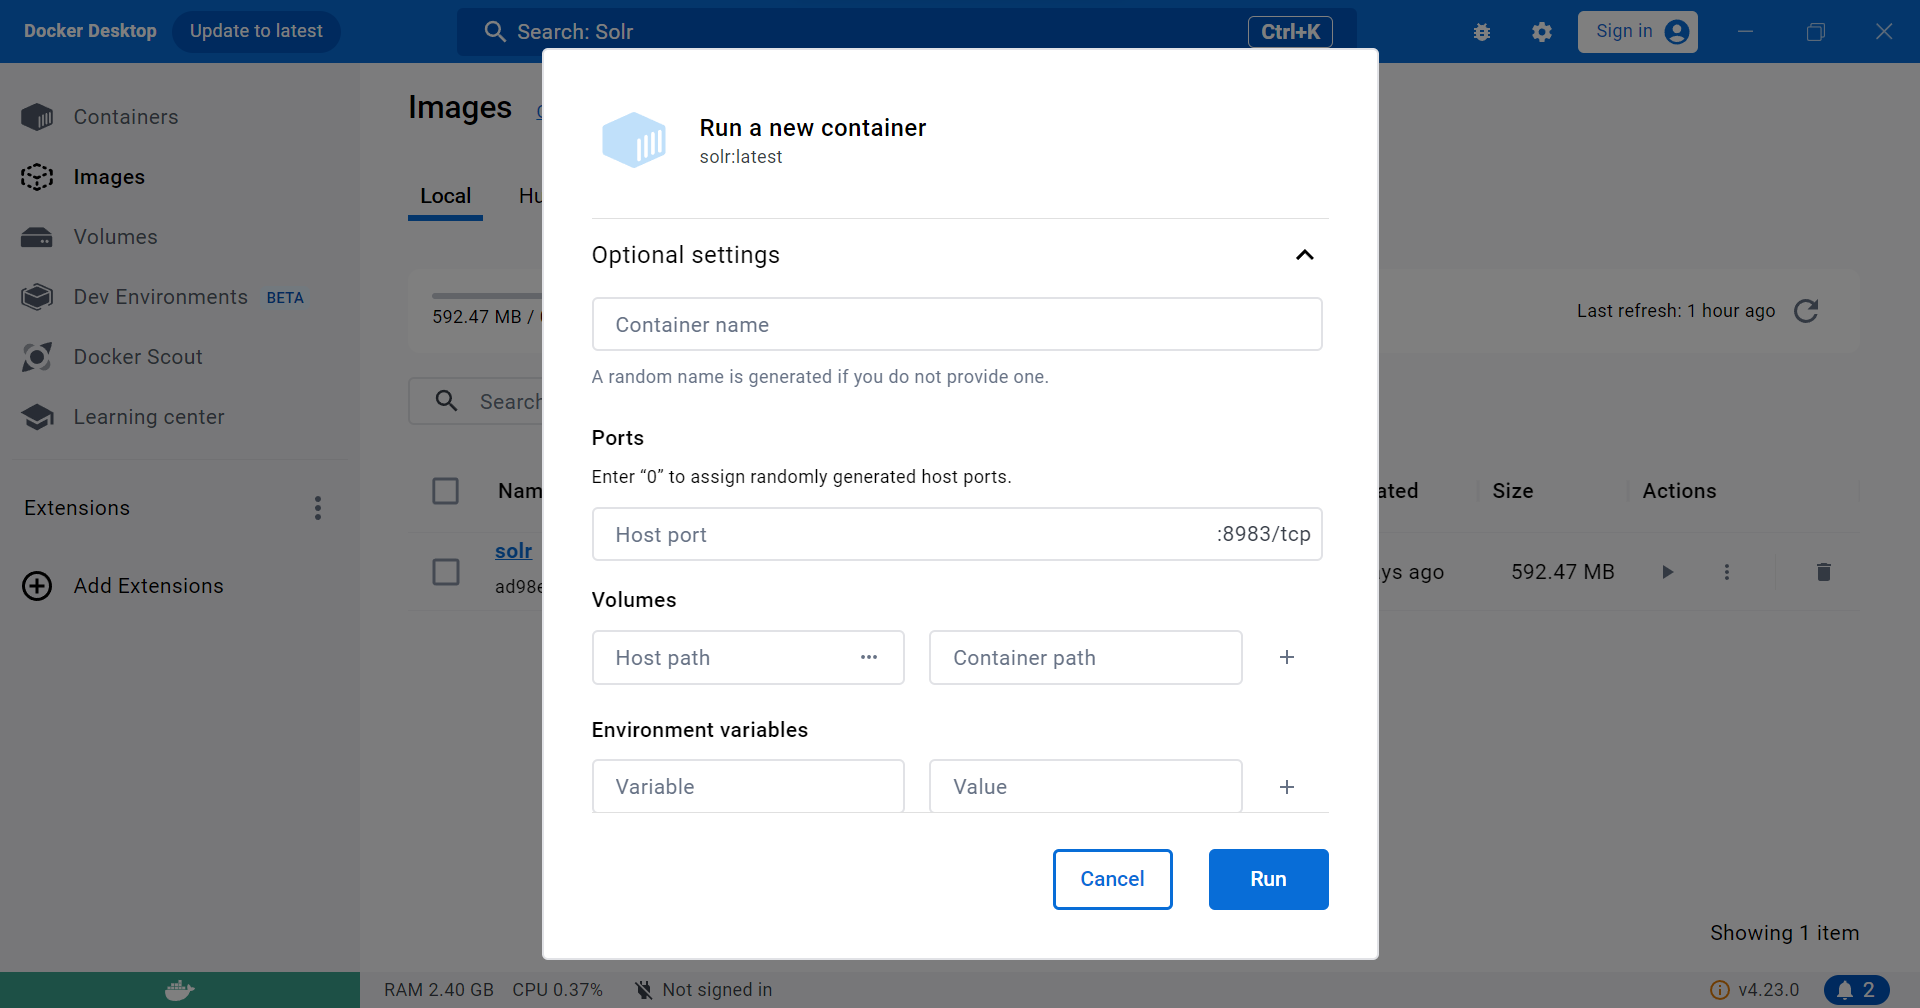
Step 3: To run the image, click the Play button on the Actions column. This will open a popup that can be expanded by clicking on the Optional Settings. There, you could provide some parameters for the container. You can provide a name, the host port number to run the Solr Web server and Volume mapping for Host and Container path.

Let me try to explain the settings in more detail.
- Name: The name given for the container. If no name is provided, Docker will generate a random name for the container. I suggest that you provide a proper name so that the container can be identified easily.
- Ports: Here you can provide a mapping between container port and host port. The container ports are inaccessible outside the container; hence we need to create a mapping for container port to a host port that can be used to get inside the container application.
- Volumes: This provides a mapping between the container path and the host path. Usually docker container have their own volumes that act as the filesystem. This is not accessible from the host machine. This mapping is done so that the container paths can be persisted in host machine and can be accessed directly from host. Here, I have mapped the Solr Home path to a host location. Solr Home path contains all the important configuration, logs and data files.
- Environment Variables: Environment variables to be passed to the container. Mostly there are used to configure various parameters in containers. I am not using any environment variables for this tutorial.
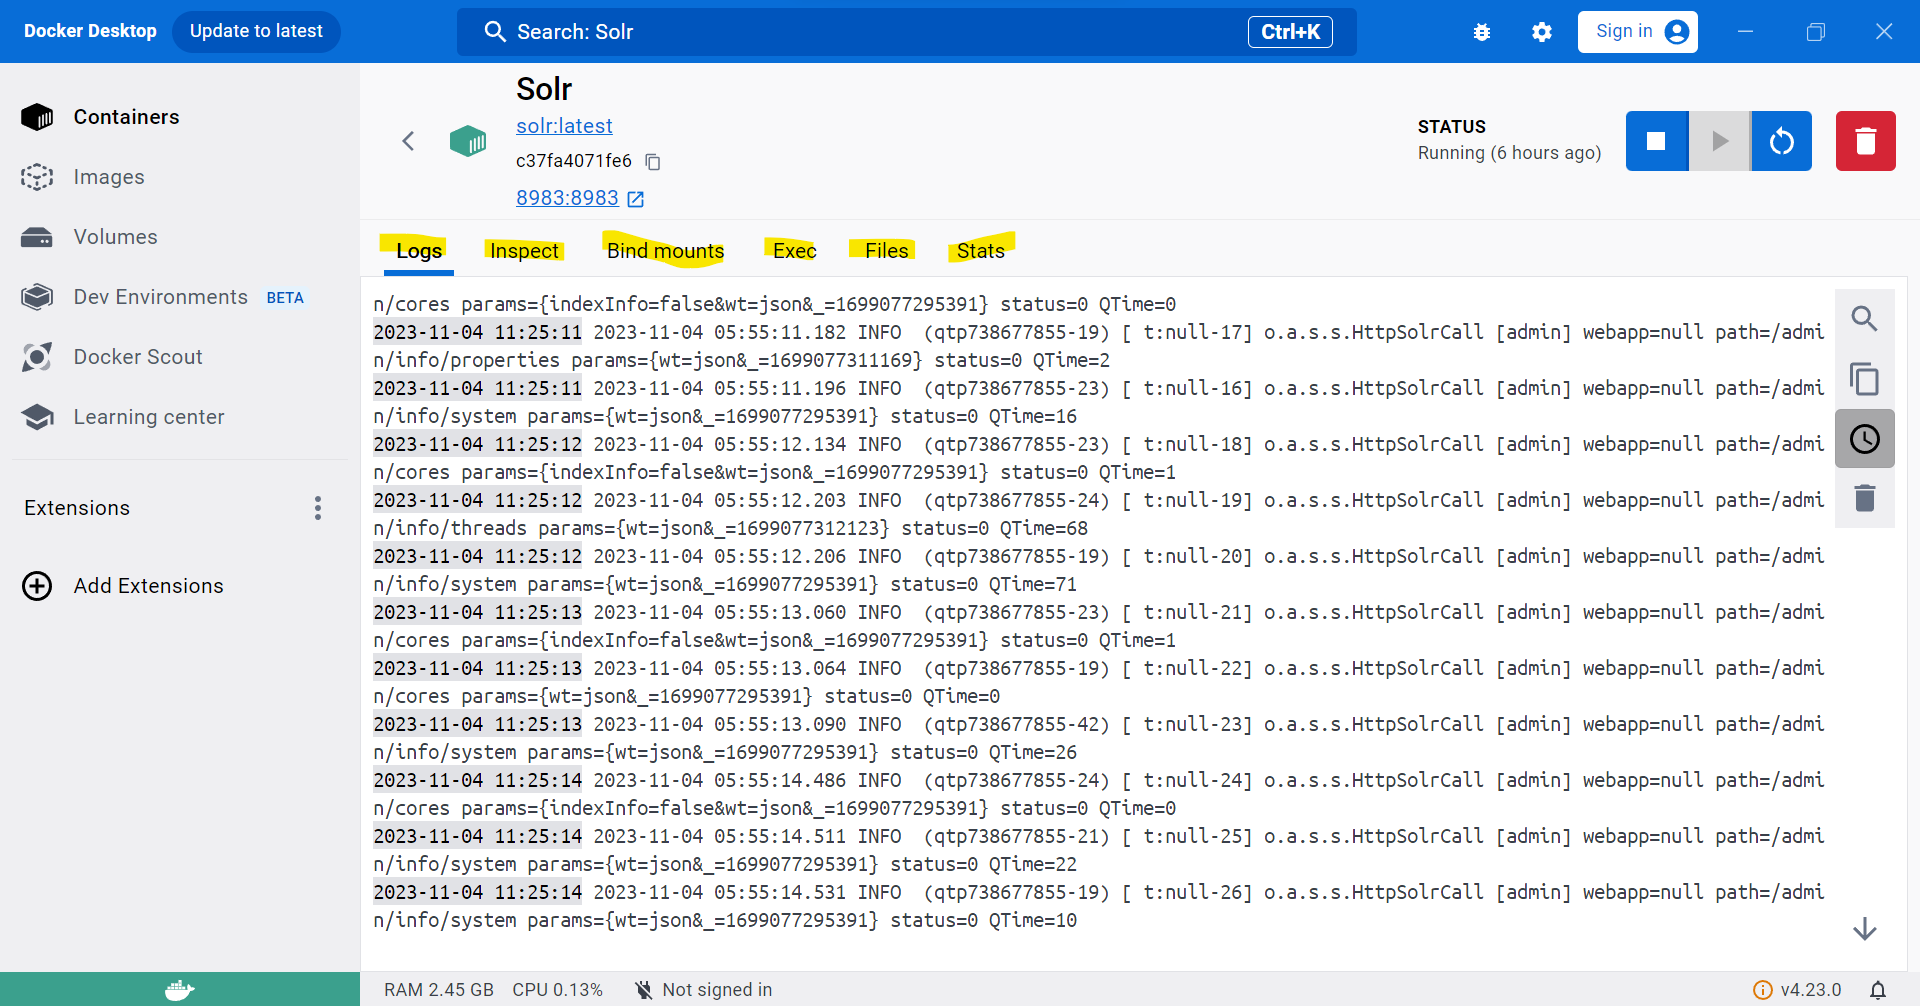
Step 5: Once you have configured all these settings, click on the Run button to start the container. It takes about 5-10 seconds to start the Solr container. Once it starts you can see the log messages appearing on the logs tab of the container. Go to the Container tab and you could see that your container is running. Here you could see the containers with details such as name, status, ports, and actions. To view more details about the container, click on the container name. This will provide you details such as the full logs from the container, inspect the container, volume mounts, file system of the container and the stats about the container performance. I will try to explain more about these in detail on another post.

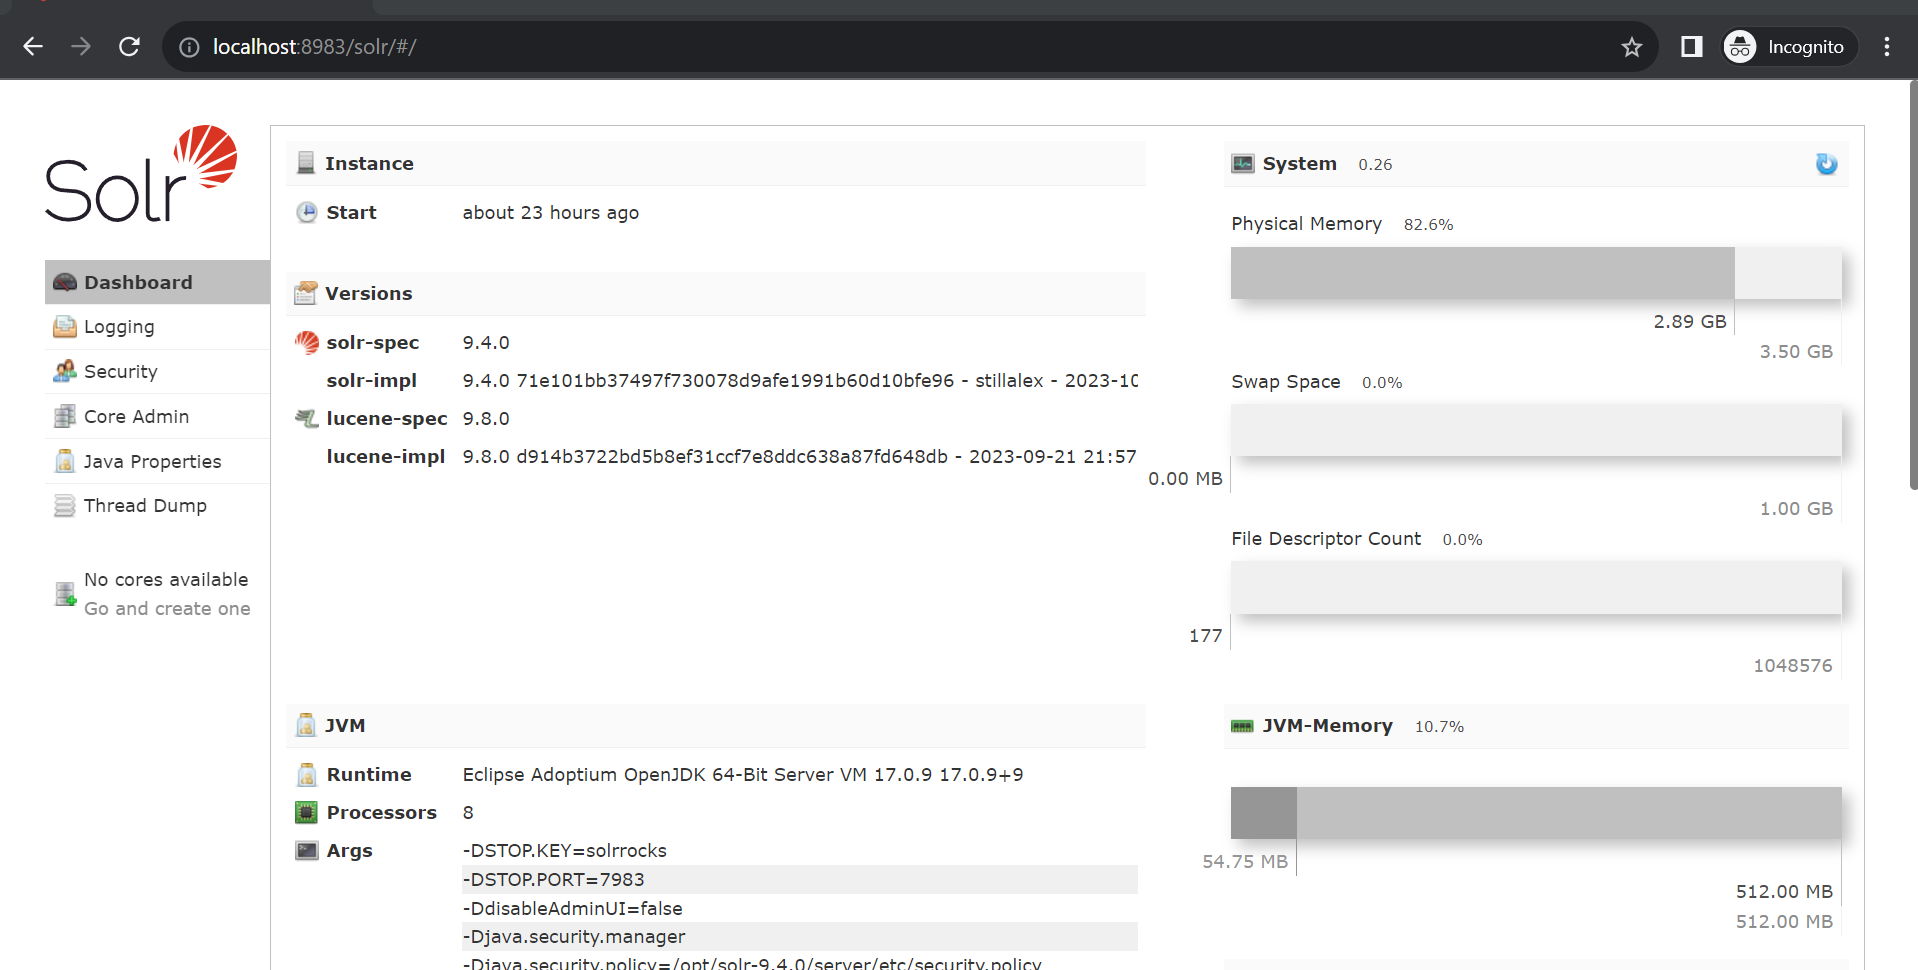
Step 6: To view the Solr admin screen, open web browser and navigate to http://localhost:[port]. The port is the port number that you have provided for the port mapping. If everything is good, you could see the Solr admin screen as shown below.

Now you have a local instance of Apache Solr running on your machine. This is just the initial installation and setup of Solr. We have a lot more to learn how to create a collection and start the search. In the next post we will be creating a collection, add documents and performing search on the documents. See you next time.

Nothing here yet

Joyal Baby
05 November 2023• 8 min readExplore a treasure of technical blog posts on Android, Big Data, Cloud, Python, and More!
© 2026 Nervo Tech. All Rights reserved.